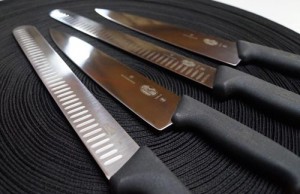
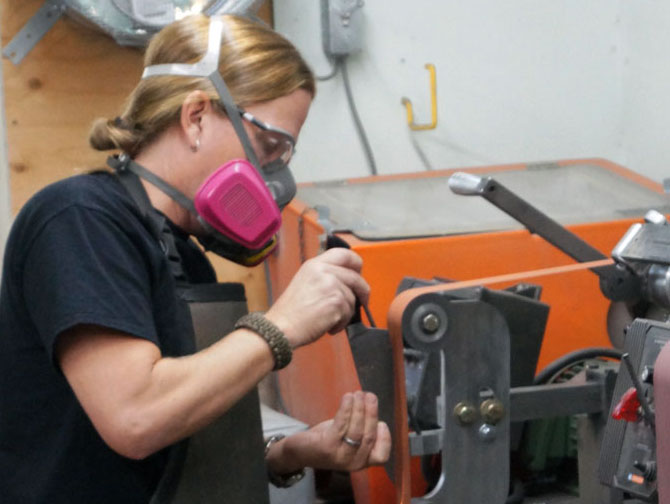
QUICK TIPS FOR MAINTAINING YOUR KITCHEN KNIVES

  • The keys to maintenance are keeping it clean and using a kitchen steel regularly. While steeling doesn’t sharpen the blade, it maintains its straightness and doing it regularly will reduce the frequency at which you’ll need to sharpen your blade.
  • A sharp knife is safer because you are more likely to use more force with a dull knife making it easier to slip. If you are a chef and use a knife multiple hours a day, you will want to sharpen every four to six weeks. A home cook only needs to sharpen their knives every six to 12 months. You can test the sharpness by dragging the end of a plastic pen (not the ball point end) over the edge of the knife – if is not ‘glass smooth’ as it travels across the blade it needs to be sharpened.
  • Don’t put your good knife in the dishwasher on a regular basis. Over time it can rust pits in the stain resistant steel. It also can impact the edge against objects dulling your edge.
  • Never cut on glass, ceramic or granite surfaces. Plastic cutting boards or mats are OK, but the best cutting board surface is end-grained wood.

IMPORTANT TOOLS FOR THE HOLIDAYS

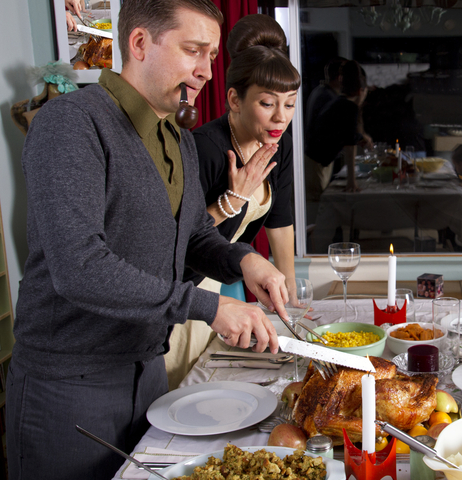
The holiday season is here which means it’s time to start preparing your tools for carving the bird.  The three most important tools that you need are:

  1. A very sharp kitchen knife.
    An 8 – 10 inch chef’s knife is my tool of choice. I also use a small paring knife for deboning. Make sure your knife is professionally sharpened before carving.  You will also want to steel your knife or realign the burr.  One misconception is that sharpening is the same as steeling.  It is not.  For step by step instructions on how to steel your knife, visit the SharpeningPros YouTube Channel – “How To Carve a Turkey.”
  2. A carving fork.
    I use a 7-inch, two-prong, stainless steel carving fork.
  3. One or two good, quality cutting boards.
    I recommend using end grain cutting boards. Cutting on hard surfaces such as glass, granite, steel or ceramic counter tops can not only dull your knife but could destroy the delicate edge.  An end grain cutting board is actually created from the end sections of many individual pieces of hardwood with the grain of the wood running vertical – up and down.  Instead of cutting against wood fibers, the knife blade cuts between the fibers which explains the apparent self-healing properties of the end-grain surface.

Cleaning and proper storage of your tools is equally important.

  1. Kitchen knife.
    Wash your knives by hand in warm soapy water being careful to avoid the cutting edge.  Do not wash in a dishwasher.  Harsh conditions like high temperatures, hot water, abrasive solutions and dishwasher agitation can cause your knives to rattle against other utensils and destroy their delicate, sharp edges.  Carefully dry by hand and place in horizontal knife block to store.  When you use a knife block with vertical slots you run the risk of dulling your knives.  Every time you slide your knife into a vertical slot – whether it’s edge side up or down – your knife edge wears against the wood which will eventually blunt your knife.
  2. Carving fork.
    Also wash by hand in warm soapy water and carefully dry.
  3. Cutting Board
    Thoroughly wash your cutting board by hand with warm, soapy water to remove all food particles. Dry by hand and then prepare the surface with mineral oil.  This will keep food particles from getting trapped in the wood pores.  Coat the top and sides with the oil and wipe off the excess.

HOW TO CHOOSE A QUALITY BUSHCRAFT KNIFE

Whether you are a weekend wilderness warrior or a professional outdoor enthusiast, a good quality bushcraft knife is your most essential tool when camping, hiking, backpacking or working in the wilderness.  Combined with basic knowledge of outdoor survival skills, a good bushcraft knife can be a true multi-tasking survival tool that can help you create shelter, make fire, process water and prepare food. Choosing a top quality knife that you can depend on is key.  Here are the five most important factors you should consider:

  1. Steel Quality
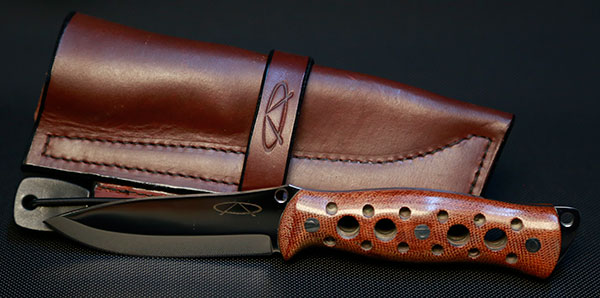
    A bushcraft knife typically has a fixed blade that is 3-5 inches in length with a back edge or spine that is sharpened flat so it can be used to strike a ferrocerium rod or as a scrapper that will enable you to prepare tinder in order to start a fire. A good quality knife must have a good quality steel that is hard, holds its edge and is wear and corrosion resistant.  Carbon steel is okay but the new stainless steels – sometimes called super or highend steels, premium or ultra premium – are the best.  In my opinion, the finest of the ultra premium steels is the CPM S90V. No knife steel known to knife makers is more abrasion or wear resistant.  With a high carbon and vanadium content, this martensitic stainless steel is guaranteed to hold an edge longer.
  2. Heat Treating Process
    Most high quality steels need to be heat treated to a hardness of around 60 RC in order to hold an edge longer. Cheaply made knives which generally use lower quality steels that are not heat treated correctly, tend to be softer.  Softer steels won’t hold a sharp edge for very long and will need to be sharpened more often.  In the long run, you will be paying more for maintenance costs for a less expensive knife than if you would have purchased a high quality knife made with good steel that has been properly heat treated.
  3. Blade Geometry
    Roughly defined, the term blade geometry refers to the grind of the blade. Having the correct blade geometry is key to determining the quality of a bushcraft knife.  I have found that the best bushcraft knives are fixed blades that feature a drop point and full tang with the heel of the tang exposed.  This will give the knife handle, blade and tip extra strength.  The blade should have a partial grind with one side featuring a Scandinavian (Scandi) grind and the other side featuring a primary and secondary bevel.  If it’s a left-handed knife, the Scandi grind will be on the carving side.  This unique blade geometry requires only one side of the secondary bevel to be sharpened.  It also enables you to carve, butcher or cut with more precision and accuracy.
  4. Handle
    Choose a knife that does not have a choil or ricasso – the indented and thickened sections of the blade located by the handle. Absence of these sections makes the user’s biometric grip on the knife more comfortable because the grip is closer to the cutting edge therefore the user does not have to torque their wrist as much when cutting or whittling. This also makes the knife easier to cut with and safer to use.  Handles with holes allow for a non-slip grip and reduces the weight of the tool which lessens body fatigue.
  5. Sharpening
    Having your bushcraft knife professionally sharpened is always a good idea. Expertly sharpened knives create a correct angle which makes the bushcraft knife easy to maintain in the field.  A competent professional sharpener will create a glass smooth edge as opposed to a toothy edge. The finer the burr on the cutting edge of your blade, the longer the edge will last.

Remember, the best survival knife is the one that is on you when you need it the most.

SELECTING THE RIGHT KITCHEN KNIVES

Stainless steel or ceramic? German or Japanese blades? Boning, fillet, paring, butcher? Kitchen knives make great holiday gifts but there are almost as many different varieties of kitchen knives as there are kitchens. Here are a few simple things to look for to make selecting the right blade for you an easier task.

  1. Stainless Steel Vs. Ceramic Knives
    Ceramic knives are popular but a quality steel knife is far better than a ceramic knife. Some companies promote ceramic as never needing to be sharpened, however in reality, not only do they dull and chip, but they are impossible to fix or sharpen. Most professional sharpeners will not waste their time on a ceramic knife so once it dulls or chips you are out of luck.
  2. German Vs. Japanese Blades
    Should you consider a foreign blade? If you are in the market for a high-end blade, look to the Japanese knives. European and American knives are known as western knives. All have their origins from Germany and France. For the price, the steel is not at the same level of quality as Japanese knives. Japanese knives are usually lighter and are made of higher quality steel and can cost less.
  3. What Style to Look For?
    Blade style is determined by the intended use of the knife. You fillet fish with a fillet knife and use a slicer for large cuts of meat. One could easily fill an entire drawer with specialty knives for each type of application. But, if you are looking for an all-round utility knife, start with an 8” or 10” cook’s or ‘chef’s knife.’ If your hand is small, or not as strong as it used to be, lean towards the 8” model. Almost every job in the kitchen can be efficiently tackled with this one utility tool. A pairing and or a 4” utility knife can make small jobs easier.
  4. Consider Handle Shape and Material
    Handle shape and material are also important considerations for personal preference and intended use. The shape must be comfortable, even when used for extended periods of time. The material the handle is constructed of is a little more complex. The majority of black smooth handled Western or European knives are made of cheap ABS plastic, the same inexpensive plastic that used to make sewer drain lines — not the stuff that will last decades in your kitchen. They do not hold up to heat or shock. A stabilized wood such as Pakawood or a stronger synthetic like Micarta (phenolic) will hold up to heat and shock and be around for you to hand down to your children. Another style that holds up extremely well is when the blade extends seamlessly into a steel handle. These can even be accidently put through a dishwasher without any concern.

4 THINGS THAT MAKE A KNIFE CUT WELL

You need all four components to make a knife cut well.  If you are missing one, your knife will not perform at optimum level.  It might not even cut at all.

  1. Good Quality Steel
    It doesn’t have to be one of the exotic super steels but it has to have fine grain structure that can be hardened enough to hold an edge.
  2. Good Blade Geometry
    The actual grind of the blade has to be angled and thin enough to enable sharpening. If not, you have an ax instead of a knife.
  3. Heat Treat Process Done Correctly
    The steel has to be hardened and then tempered back to the optimum hardness for that steel to hold an edge. Usually in the realm of 54 to 65 on the Rockwell C (RC) scale.
  4. Sharpened Correctly
    Once all three components have been met, you can sharpen the knife to the correct angle – 14 to 30 degrees – and hone it to a glass smooth edge.

CARVING PUMPKINS TIPS

Everyone has their own technique for carving pumpkins.  Some people use plastic carving kits while others employ an assortment of kitchen knives, garden tools and miscellaneous sharp objects.  Pumpkin carving, like any other job, needs the right tool for getting the job done safely.  Here are my top 3 tips for what NOT to do when carving a pumpkin.

  1. Never use a kitchen knife – serrated or smooth edge. The amount of force needed to cut through the outer skin of the pumpkin makes this type of tool difficult to control when carving.  Instead, utilize a wood-cutting jigsaw blade with long handle.  It’s easy to control and you do not have exert a lot of force to cut through the skin which makes this tool a safer choice.
  2. Never use a knife to scoop out the seeds and stringy membranes inside the pumpkin. If you torque your knife sideways, you can chip, snap or bend it.  A good tool for this job is a flat, paddle-style ice cream scoop preferably made out of metal.
  3. Never use a utility knife or small kitchen knife to carve designs in the outer skin of a pumpkin. This can dull your good knives.  Some of the best tools to use for this are pottery tools or the plastic pumpkin carving kits available around Halloween.  They are designed for this type of job and are safe to use.

HOW I GOT STARTED

One of the questions I get asked most often in this business is how did I get started.


When I was a freshman in high school I took a course on sportscraft.  I wasn’t sure what I expected to get out of the class but what I discovered was how important our tools are – for hunting, cooking, working and survival.  Throughout history the most important tool we possess has always been the knife.  It’s a necessity.  As my interest grew, I began to do my own research.  Not only reading everything I could about the craft of knife making and sharpening but also seeking out and talking to other craftsmen.


As I learned how to design and create my own knives, quality became extremely important to me.  I used the best steels, handle materials and heat treating processes.  When I couldn’t find a machine to meet my standards, I designed my own.  At some point – during this 31 year evolution – my craft became my art, an extension of myself.  Each knife I make is not only functional but unique and original.